
Peugeot 107 – sound installation


In this small car, we were given the task of building a high-quality audio system without unnecessary modifications to the car, because… The car was bought by the owner for 2-3 years. Therefore, this did not imply < 1 >processor systems with kilometers of cables, boxes in the trunk, complete soundproofing of the interior, alteration of doors and other horrors.
On the other hand, we immediately liked the factory speaker locations designed by Toyota engineers (as everyone knows, the Peugeot 107 is essentially a restyled Toyota Aygo). The stock 10cm speakers were positioned at the corners of the dashboard, firing against the windshield; the difference in distance from the left and right speakers to the listener was minimal, which benefits the vehicle’s soundstage. Furthermore, the engineers angled the speakers so that their axes intersected between the front seats—a feature that is both excellent and surprising, given that designers usually consider in-car audio last, if at all.

This is what the factory-installed Panasonic head unit looked like. The first thing we did was happily remove it 🙂


After purchasing an adapter frame for the Peugeot 107 and installing the Clarion VZ 709E multimedia head unit< 1 >, even the wretched stock speakers came to life! A soundstage emerged—admittedly narrow, but accurate. That’s when we decided once and for all to install new speakers in the same locations, albeit with significant modifications. First, we dismantled the Peugeot’s dashboard to see just how large a speaker we could fit there; a 10 cm size clearly wouldn’t be enough for a decent result.
The dashboard disassembles conveniently from top to bottom:

After dismantling the dashboard, we found that fiberglass enclosures would certainly fit; however, the Focal 130KR speakers chosen by the owner wouldn’t have benefited at all from being installed in enclosures—they simply aren’t designed for that type of mounting. Fortunately, this simplified the task.
The ordered speakers have finally arrived:

Made in France:

The magnets are quite large:

We have to cut, but that’s never scared us.

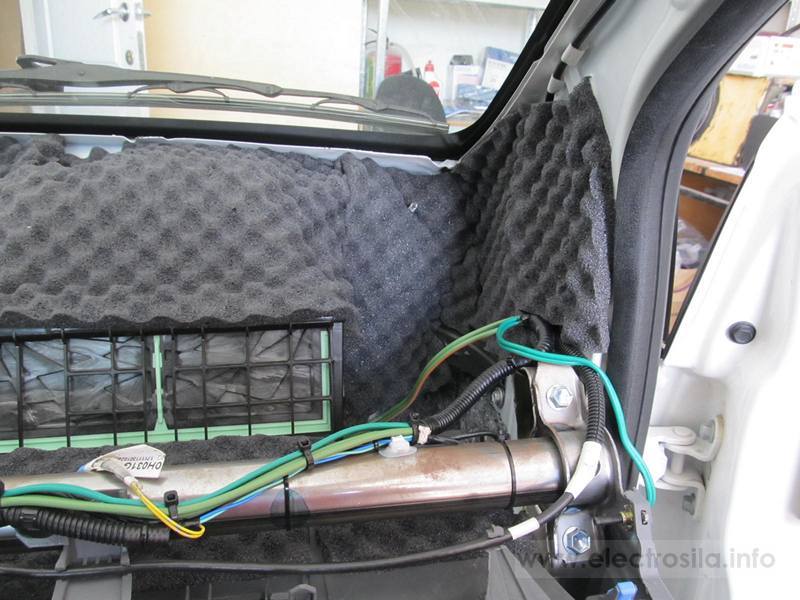
The heater housing was in our way, so we had to trim it down a bit too.

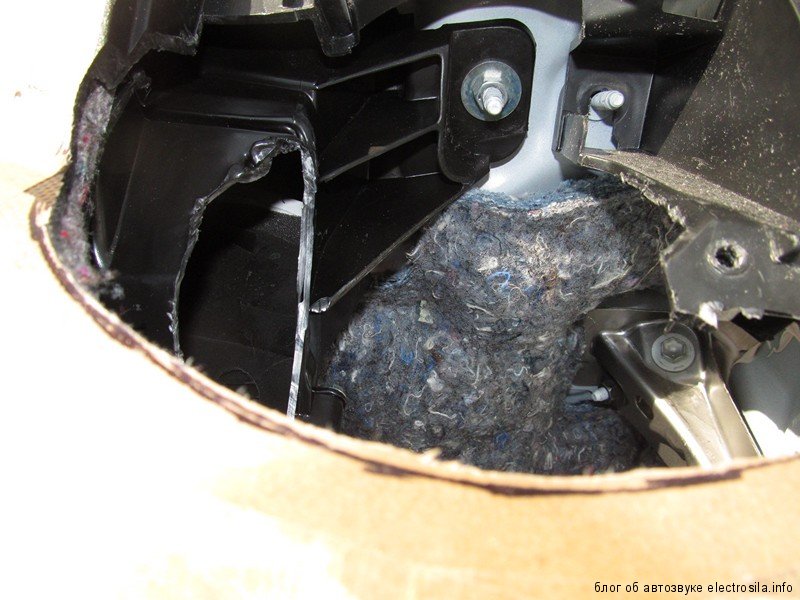
Not only the heater unit but also the side air ducts stood in the way of the speaker; these also had to be slightly trimmed and then neatly capped off.

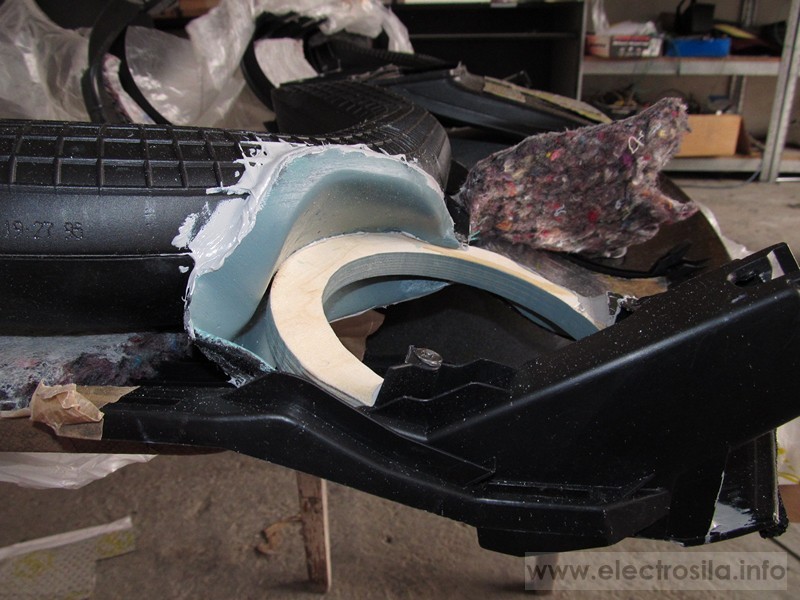
Here is the result. The mounting locations were significantly enlarged to accommodate 13 cm speakers with large magnets, yet we preserved the original factory orientation of the drivers:

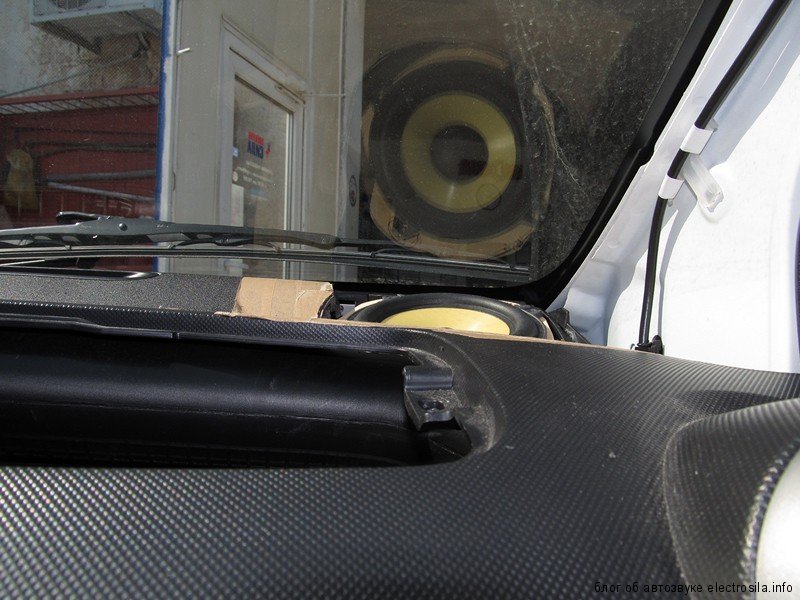
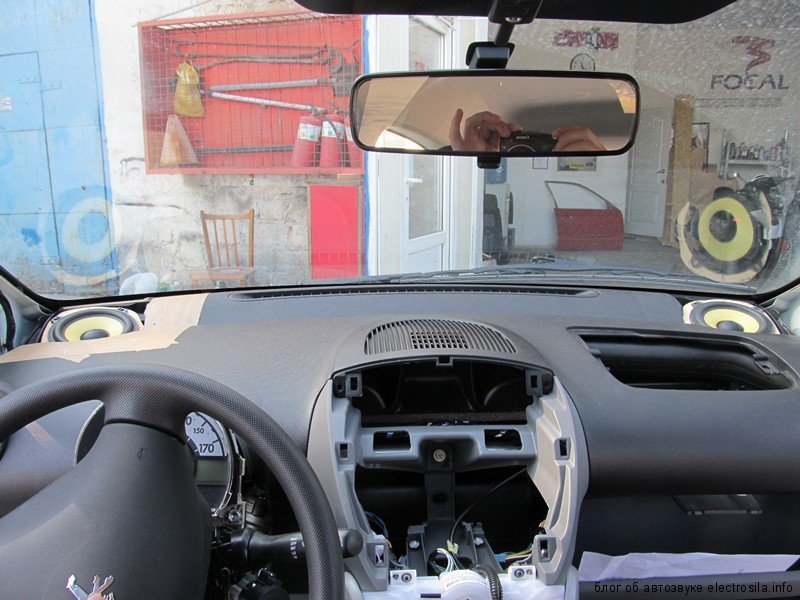
Now, the tweeter needs to be positioned and aimed correctly. The fundamental rule for systems without a dedicated processor—and indeed for any system—is to place the tweeter close to the midrange driver, or in this case, the mid-bass driver. We used a Chinese laser pointer to align the radiation axes of the future tweeters with the same point the mid-bass drivers are “looking” at. Here is the result:

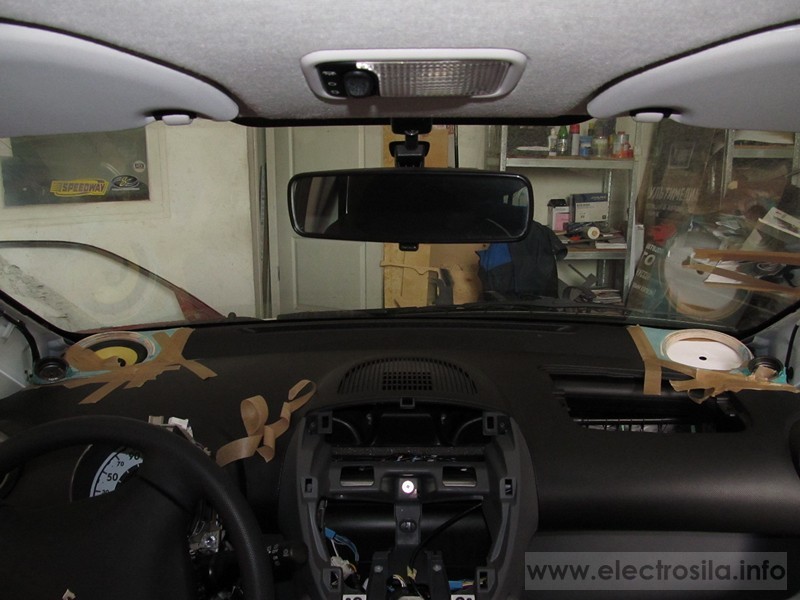
We decided to cover the cutouts in the plastic with body-colored trim panels—omitting the protective mesh so as not to spoil the stunning look of the Kevlar diffusers. Here is how the panels were made:


It was precisely into these trim panels that the tweeters were integrated:

Then the linings were prepared for painting and painted to match the body color. Here’s what we got:


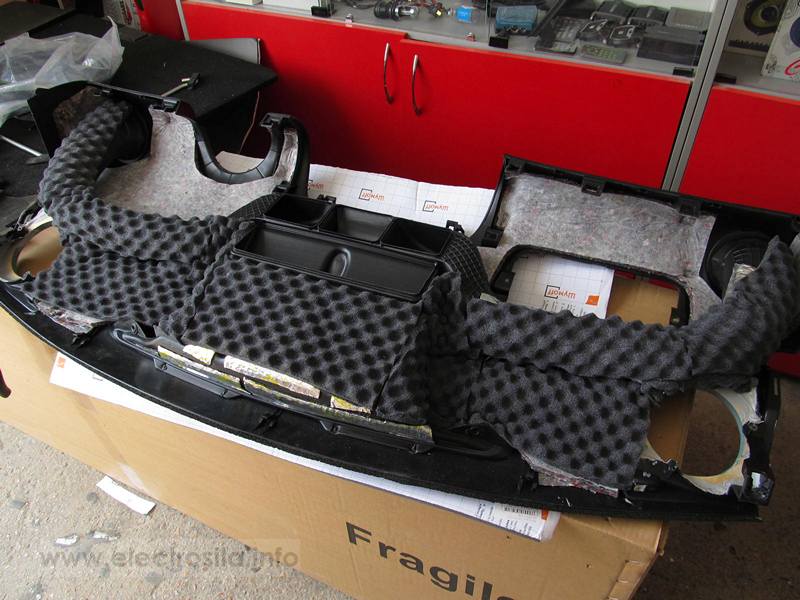
All the plastic components of the dashboard were treated with STP’s Vibroplast and subsequently with Shumoff’s Germeton A15 to eliminate unwanted reflections, since the speakers essentially play into the space beneath the dashboard without dedicated enclosures.

Once the speakers were installed, we turned our attention to selecting a subwoofer. Given that 13cm mid-bass drivers in this type of enclosure simply cannot reproduce bass frequencies below 80 Hz, a front-mounted subwoofer is required for proper low-frequency reproduction. Otherwise, the soundstage would inevitably be pulled toward the rear—especially considering the absence of a signal processor. We decided to use the Focal 13WS, a unique 13cm subwoofer. And the perfect spot was found for it—replacing the small-item bin on the right—since the Peugeot 107 doesn’t even have a conventional lidded glovebox.
The subwoofer enclosure was constructed from plywood and fiberglass, followed by filling and wrapping in Alcantara.

According to the calculations, the bass reflex port turned out to be quite long—about 50 cm with a diameter of 5 cm; obviously, a pipe of this length would not fit inside a small enclosure. Therefore, the port makes two bends inside the cabinet, exits to the outside, and then re-enters the enclosure.


A body-colored fiberglass panel completes the design of the subwoofer enclosure.
This subwoofer placement made it possible to seamlessly blend the frequency ranges of the 13 cm mid-bass drivers and the subwoofer. The crossover frequency turned out to be relatively high—around 100 Hz—but thanks to the subwoofer’s frontal positioning, the bass is localized exactly where it should be: at the front.
Now, regarding the amplifier: we chose the Hertz HDP 4 Class D amplifier for its excellent sound quality, compact size, and low power consumption. We decided to mount it under the driver’s seat to avoid taking up space in the already tiny trunk. Furthermore, this placement allows for the shortest possible cable runs, resulting in lower signal loss and reduced costs.
We fabricated two mounting plates—an upper and a lower one—for the amplifier. The lower plywood plate is bonded directly to the vehicle body using polyurethane sealant. The upper plate is screwed onto the lower one, securing through the carpeting. This creates a very rigid mounting setup. The crossovers are also mounted on this same plate. (Incidentally, placing the crossover near the amplifier also has a positive effect on the sound.)


To protect the amplifier from mechanical damage (for example, from the feet of rear-seat passengers) and the ingress of foreign objects, we fabricated a fiberglass cover:

Unfortunately, the photos taken during the making process were lost—here is the final result:

The amplifier’s protective cover is also painted in the body color and clear-coated, in keeping with the overall concept.


Here is a general view of the installation:


The result of this setup was a first-place finish in the class at the competition in Odesa.

The November 2012 issue of FOR’Z magazine featured our car on the cover and dedicated two and a half spreads to the installation!